How to Make Paper by Hand
Papermaking — An Art
for All Ages
Over 2,000 years ago the Chinese already had developed papermaking
to a fine art. The method which they invented is essentially the same
as that used by Dard Hunter,
who made his own paper, wrote his own books, and printed them with
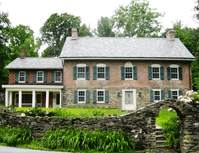
moveable type fonts. Dard did some of his work in Marlboro, New York
at the Gomez Mill House between the years 1912-1918. You, too, can
make paper by hand. There are hardly any age limits. These instructions
describe how to do it. Adult supervision is required for certain steps
— such as when using an iron to dry the newly made sheets of
paper. An adult also needs to be involved if you want to make your
own papermaking kit. The last part of the instructions tells how to
make your own kit. The ancient Chinese artisans did not have blenders.
They used wooden mallets to pound fibers from rice and other plants.
Dard Hunter used a machine called a “Hollander beater.”
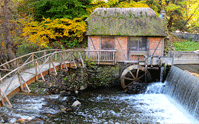
You may have the chance to see it at the mill museum at the Gomez
Mill House, where Dard Hunter made his paper sheets for his books.
(His books described the ancient art of papermaking, and he also collected
handmade paper made around the world.)And the ancient Chinese most
certainly did not have electric steam-irons! When they were done squeezing
water out of their paper sheets, they simply hung them up to dry.
Dard Hunter did the same. He used to hang them to dry under the thatched
roof of the mill. You can hang up your pager sheets too. That’s
okay if you have a lot of time. The step-by-step instructions here
are designed so that a lot of kids can make and decorate their own
paper sheet. The sheets will be of just the right size to make a hand-made
greeting card.Step-by-step Instructions Set-up
-
Set up a long table or the
equivalent of three card tables.
-
Spread out waterproof table
cloths or tarps on first two tables or end or long table.
-
Set up blender on first table.
-
Place basin on second table
with rolling pin, sponge, and towels handy.
-
Setup iron on third table
(or ironing board).
Preparing the Pulp
- Select the pieces of paper to be recycled.
Toilet paper works really well. You can even blend some of it
with other kind of paper so that the resulting paper will be
quite strong. Old magazines and newspaper are fine — but
make sure you have permission before you put them into a blender
belonging to someone else! The ink can be washed off with soap.
But consider yourself warned! You can also recycle office paper,
scraps, bags, and pieces of non-waxed boxes. Presoaking in warm
water will help.
- Go easy on the amount so that you don’t
burn out the blender. Start with the equivalent of four pieces
of copy paper, about 100 squares of toilet tissue, or the equivalent
amount of another paper type to be recycled.
- Rip the paper into small bits, which are
places into the blender.
- Fill the blender with water. Warm water
helps, but is not required.
- Put the top on the blender (important!).
- Run the blender slowly at first. Then run
it faster. You want the pulp to look smooth and well dispersed.
- Run the blender for about 30 seconds.
- Check that no flakes of paper remain. If
so, blend longer.
Forming the Sheets
-
Select a site for your “paper
machine.” If you’re really cautious, you can set it
up in a kitchen sink. Most people have great fun and few problems
working on a couple of beach towels on a plastic table cloth.
The towels are there to soak up any spills. But don’t work
over a rug or fine furniture.
-
Fill the basin half way with
water.
-
Add one to five blender-loads
of pulp. One blender-load will yield tissue-weight sheets of
paper. Four blender-loads will yield sheets thick enough to
be used as greeting cards.
-
Stir the mixture.
-
Place forming fabric into
hinged frame so that the smooth side faces “up.” Up
is toward the thicker side of the frame. Close the frame by
placing the hook through the eyebolt.
-
Place the frame edgewise
into the slurry of pulp and then level it out while it is submerged.
-
Gently wiggle the frame side-to-side
until the pulp slurry above it looks even.
-
Slowly lift the frame up
until it is above the level of the water.
-
Wait until most of the water
has drained from the new paper sheet.
Pressing the Sheets
-
Place the frame right-side-up
on the table and open the latch.
-
Remove the forming fabric
and place it right-side-up on the table.
-
Take a second piece of forming
fabric and identify the smooth side.
-
Place the smooth side against
the first forming fabric and the enclosed wet sheet of paper.
-
Think of the two pieces of
fabric, and the new paper sheet between them, as a “sandwich.”
Pat the sandwich with a sponge. Pat gently at first.
-
Wring out the sponge, then
rub the sandwich firmly with it.
-
Place the sandwich on a towel.
-
Use the rolling pin to squeeze
out more water.
-
Lift off the upper layer
of forming fabric.
-
Place a sheet of blotter
paper over the new paper sheet and forming fabric.
-
Use the rolling pin.
-
Gently lift off the new paper
sheet, starting with its edge.
-
Place the new paper sheet
between blotters and roll to remove as much water as possible.
Drying the Paper
-
Place the new paper sheet
on top of a stack of dry blotters or other surface suitable
for use as an ironing board.
-
Press gently and repeatedly
with hot surface of iron until paper appears firm.
-
Iron until dry. Sheet may
be flipped over.
When You Think You're Done
-
No, you are not done yet.
-
Clean up all your equipment,
when you are done.
-
Put everything away dry.
-
Congratulations! Your paper
making operation is complete!
Making
Your Own Kit
Assembly of the Frame
-
Use table-saw to cut pieces
of the following dimensions, starting with “one-by-something”
pine board at least 36" long:
- 3/4" x 1 1/4" x at least 36" (for top
part of frame)
- 3/4" x 3/4" x at least 36" (for bottom
part of frame)
-
Orient each piece so that
the sides of the original board are vertical.
-
Use miter saw to cut a 45-degree
angle near to one end.
-
Measure and cut as shown
in figure below.
-
Repeat for the other piece
of cut wood (for second frame-half).
-
Join the pieces into a rectangle,
using finishing nails. Pre-drill the holes.
-
File edges round, sand, and
paint or varnish the frames.
-
Place a metal ruler or other
suitable object between the frame halves to space them apart
approximately 1/8 inch.
-
Attach two hinges along one
of the longer edges, joining the two frame-halves together,
with a space of about 1/8 inch between them.
-
Insert a hook and screw-eye
in the middle of the opposite side, still with the spacer between
the two halves of the frame.
-
Remove the spacer. Carefully
attach a section of 1/4"-thick, adhesive weather-stripping along
the inner edge of the opening of the thicker (upper) side of
the frame. The weather stripping will be compressed when the
frame is closed.
-
Your frame is ready! Just
insert a 7" x 9" rectangle of forming fabric (smooth side up.)
Special Effects
Want to make something a bit unique? Try adding pieces of dry flower
petals, spices, fragments of colored thread, tinsel pieces, or fragments
of colored paper. Sequins and glitter work too. Even grass. Use
your imagination. There’s an easy method and a harder method
to get your favorite petals, thread pieces, etc., become part of
your paper sheet. The easy way is to just stir it into the dilute
slurry of pulp in the tub. Then make a bunch of sheets of paper,
all containing your favorite item.
There’s a better way, especially if you want to include something
big, like a dried flowers, or a fragment of a printed picture, as
part of your new paper sheet. In such cases you really might want
a bit of control as to which way each item is facing and how it
is centered on the sheet. So wait until the frame and screen have
been immersed in the slurry. Bring up the frame so that it is about
even with the surface of the water — so that the paper sheet
is not yet drained. Then, place the items on the top of the wet
slurry in the frame. Don’t worry if it sinks into the fiber
slurry, that will really help keep your items firmly held to the
paper sheet, after it has been made.
Making colored papers is a great idea. The best method is to start
by recycling some colored papers. Construction paper is great. Or
you can use the kind of color paper often used for photocopied announcements.
Rip it into bits, put it in warm water, and blend it. The same as
any other paper to be recycled.
Dyes usually should be avoided when working with kids. There’s
too much danger of getting something stained. Food coloring does
not adhere well to the kinds of fibers used in papermaking.
For the adventuresome, you can achieve a nice gray tone by recycling
newspapers or other printed materials. A word of warning: This can
make your blender very dirty! Make sure that this is okay with the
owner of the blender! Ask permission! A lot of the black ink will
come out of the newspaper as you recycle it. You will be able to
appreciate that this also happens in a factory, it is called “de-inking.”
When it happens in your kitchen, it is called a “mess.”
Depending on the age group, supervision is recommended. (You wouldn’t
want to miss the fun anyway!) Maybe an adult should use the hot
iron (or at least watch). An adult may want to run the blender as
well. Parents and teachers will know best.
Packing List
-
Clear plastic basin with
lid (e.g. Rubbermaid Freshtops 6.5 gal storage box). This basin
holds the rest of the kit — everything needed to make paper.
-
Plastic water-proof table
cloth or tarp
-
Blender
-
Extension cord
-
Hinged frame with 8" x 5
3/4" opening .
-
Two 7" x 9" pieces of forming
fabric, the type of screen used on full size paper machines.
-
Rolling pin
-
Sponge
-
Towels
-
Blotter paper sheets (8"
x 10", to be dried out and re-used)
-
Electric iron
Gomez Mill House wishes to thank Dr.
Martin A. Hubbe for providing the following information.
Martin
A. Hubbe, Ph.D., Associate Professor, Dept. of Wood & Paper
Science, NC State University, Box 8005, Raleigh, NC 27695-8005
Website: http://www4.ncsu.edu/~hubbe
|